Difference between revisions of "Octagon Documentation"
(Adding Loft Construction Details and Editing Future Steps) |
|||
| (6 intermediate revisions by the same user not shown) | |||
| Line 12: | Line 12: | ||
<gallery class="center" mode=packed heights=150px> | <gallery class="center" mode=packed heights=150px> | ||
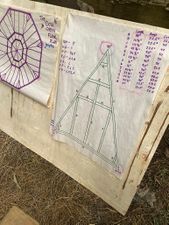
File:HandDrawnTrianglePlan.JPG|Initial Plan for the Triangular Floor Joists | File:HandDrawnTrianglePlan.JPG|Initial Plan for the Triangular Floor Joists | ||
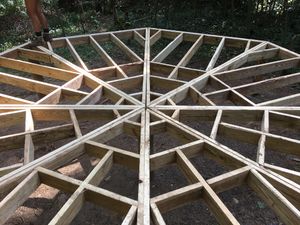
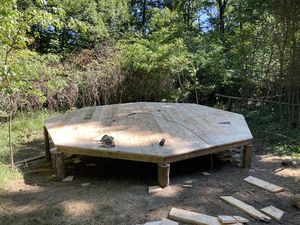
| − | File:OctogonFloorJoistAbove.jpg| | + | File:OctogonFloorJoistAbove.jpg|Completed Joist System |
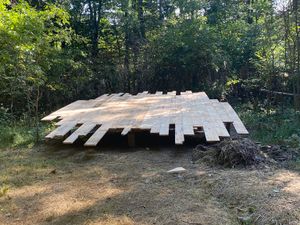
File:UncutSubfloor.JPG|Nailed Subfloor Boards | File:UncutSubfloor.JPG|Nailed Subfloor Boards | ||
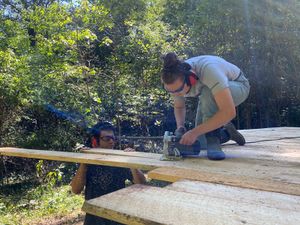
File:CuttingSubflooring.jpg|Cutting Subflooring Perimeter with Circular Saw | File:CuttingSubflooring.jpg|Cutting Subflooring Perimeter with Circular Saw | ||
| Line 24: | Line 24: | ||
<gallery class="center" mode=packed heights=150px> | <gallery class="center" mode=packed heights=150px> | ||
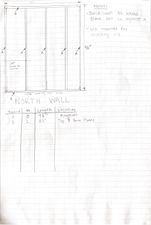
File:NorthWallPlan.jpg|North Wall | File:NorthWallPlan.jpg|North Wall | ||
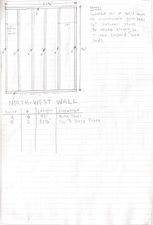
| − | File:NorthWestWallPlan.jpeg| | + | File:NorthWestWallPlan.jpeg|Northwest Wall |
File:WestWallPlan.jpeg|West Wall | File:WestWallPlan.jpeg|West Wall | ||
| − | File:SouthWestWallPlan.jpg| | + | File:SouthWestWallPlan.jpg|Southwest Wall |
File:SouthWallPlan.jpg|South Wall | File:SouthWallPlan.jpg|South Wall | ||
| − | File:SouthEastWallPlan.jpg| | + | File:SouthEastWallPlan.jpg|Southeast Wall |
File:EastWallPlan.jpg|East Wall | File:EastWallPlan.jpg|East Wall | ||
| − | File:NorthEastWallPlan.jpeg| | + | File:NorthEastWallPlan.jpeg|Northeast Wall |
</gallery> | </gallery> | ||
<gallery class="center" mode=packed heights=150px> | <gallery class="center" mode=packed heights=150px> | ||
File:NorthWallPicture.jpg|North Wall | File:NorthWallPicture.jpg|North Wall | ||
| − | File:NorthWestWallPicture.jpg| | + | File:NorthWestWallPicture.jpg|Northwest Wall |
File:WestWallPicture.jpg|West Wall | File:WestWallPicture.jpg|West Wall | ||
| − | File:SouthWestWallPicture.jpg| | + | File:SouthWestWallPicture.jpg|Southwest Wall |
File:SouthWallPicture.jpg|South Wall | File:SouthWallPicture.jpg|South Wall | ||
| − | File:SouthEastWallPicture.jpg| | + | File:SouthEastWallPicture.jpg|Southeast Wall |
File:EastWallPicture.jpg|East Wall | File:EastWallPicture.jpg|East Wall | ||
| − | File:NorthEastWallPicture.jpg| | + | File:NorthEastWallPicture.jpg|Northeast Wall |
</gallery> | </gallery> | ||
| Line 47: | Line 47: | ||
<gallery class="center" mode=packed heights=150px> | <gallery class="center" mode=packed heights=150px> | ||
| − | File:BeginingFraming.jpg| | + | File:BeginingFraming.jpg|Beginning Framing |
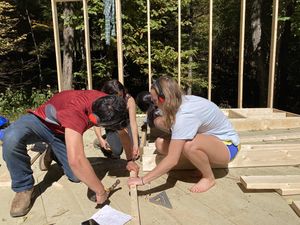
File:WorkingOnWall.jpg|Assembling Frame | File:WorkingOnWall.jpg|Assembling Frame | ||
File:NailingFrame.jpg|Nailing Frame Together | File:NailingFrame.jpg|Nailing Frame Together | ||
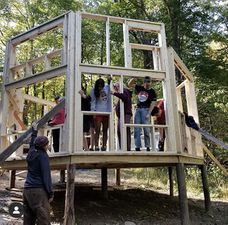
File:RaisingWall.JPG|Raising the Last Wall Frame | File:RaisingWall.JPG|Raising the Last Wall Frame | ||
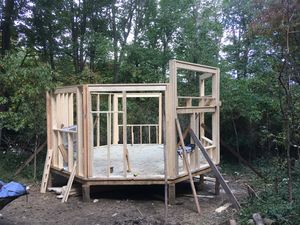
| − | File:OctogonFraming.jpg|Framed | + | File:OctogonFraming.jpg|Framed Octagon |
</gallery> | </gallery> | ||
| Line 57: | Line 57: | ||
##Insulation | ##Insulation | ||
| − | The octagon insulation is made up of sections of light straw clay and bottle walls. Both required a multi-step process. For the light straw clay, we sifted clay harvested on the land, mixed it with water to make a clay slip, then tossed it with local straw and packed it into the walls. We tried stomping at first, then pushed it in with our hands, then started just pushing the edges of each section down with sticks to keep the | + | The octagon insulation is made up of sections of light straw clay and bottle walls. Both required a multi-step process. For the light straw clay, we sifted clay harvested on the land, mixed it with water to make a clay slip, then tossed it with local straw and packed it into the walls. We tried stomping at first, then pushed it in with our hands, then started just pushing the edges of each section down with sticks to keep the center less packed. For every two feet we went up we put in a piece of wire to give it support. For the bottle walls, we cut four inches off the bottom of wine bottles and then taped two pieces together to make an 8-inch long section to put into the 5.5-inch thick walls. The taped-together bottles were packed into the wall with cobb between them. |
<gallery class="center" mode=packed heights=150px> | <gallery class="center" mode=packed heights=150px> | ||
| Line 63: | Line 63: | ||
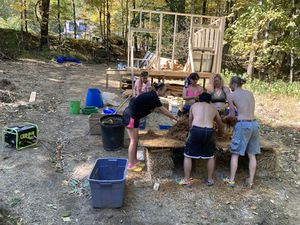
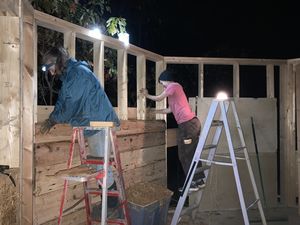
File:NightPackingLSC.jpg|Packing Light Straw Clay at Night | File:NightPackingLSC.jpg|Packing Light Straw Clay at Night | ||
File:PackingLSC.jpg|Packed Light Straw Clay | File:PackingLSC.jpg|Packed Light Straw Clay | ||
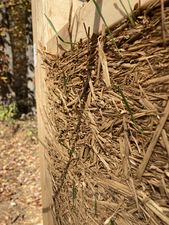
| − | File:InsulationCloseUp.jpg|Packed Light Straw Clay Close | + | File:InsulationCloseUp.jpg|Packed Light Straw Clay Up Close |
</gallery> | </gallery> | ||
| Line 75: | Line 75: | ||
File:RidgeBeam.jpg|Installing Ridge Beam | File:RidgeBeam.jpg|Installing Ridge Beam | ||
File:InstallingNorthBeam.jpg|Bolting North Beam | File:InstallingNorthBeam.jpg|Bolting North Beam | ||
| − | File:InstallingRafters.jpg| | + | File:InstallingRafters.jpg|Attaching Rafters |
| − | File:NailingCeilingBoards.jpg| | + | File:NailingCeilingBoards.jpg|Completed Rafters |
File:SlantedRafters.jpg|Angled Rafters from Ridge to North Beam | File:SlantedRafters.jpg|Angled Rafters from Ridge to North Beam | ||
File:CeilingBoardsOn.jpg|Roof with Ceiling Boards | File:CeilingBoardsOn.jpg|Roof with Ceiling Boards | ||
| Line 82: | Line 82: | ||
File:RoofPreTrim.jpg|Nailing on Corrugated Roofing | File:RoofPreTrim.jpg|Nailing on Corrugated Roofing | ||
File:CaulkingRoof.jpg|Caulking Holes in Roofing | File:CaulkingRoof.jpg|Caulking Holes in Roofing | ||
| − | File:CompleatedRoof.jpg| | + | File:CompleatedRoof.jpg|Completed Roof |
</gallery> | </gallery> | ||
| + | |||
| + | ##Installing Windows | ||
| + | We nailed and screwed the pre-cased windows into the holes for them in the wall frames. For some windows, we built frames and attached them to the outside of the windows so the window could be attached to the wall. | ||
##Loft Construction | ##Loft Construction | ||
| − | The loft is supported by the | + | The loft is supported by the east wall, the southeast wall, and the center poplar post. It is built with 2x6 girders and 2x3 joists. |
| − | + | <gallery class="center" mode=packed heights=150px> | |
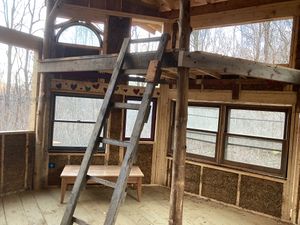
| + | File:Loft.jpg|Finished Loft | ||
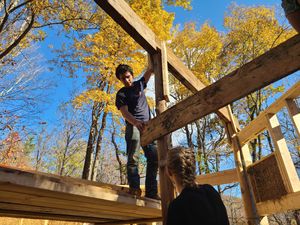
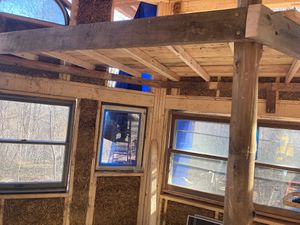
| + | File:LoftBottom.jpg|Structure of the Loft | ||
| + | </gallery> | ||
##Future Steps | ##Future Steps | ||
| − | As of 12/16/2021, the octagon was | + | As of 12/16/2021, the octagon was Tyveked to be waterproof for the winter. In the spring or future, the octagon will need plaster on the walls to protect the light straw clay insulation. In addition to the plaster, a few other projects have to be completed to fill gaps in the walls. One window still needs to be framed and installed in the top of the southeast wall, and a front door needs to be installed. The sections left open for bottle walls need to be completed or filled with light straw clay. A bump-out needs to be constructed or something needs to be installed to cover the hole to it to leave it as a deck, and the section above the bump-out, between the northeast Wall and the roof, needs to be covered with boards. To complete the roof, a hole needs to be cut for a chimney pipe from the woodstove. It would also be good to add some kind of waterproofing or filler between the ridge cap and the roofing to prevent water from being blown upward and leaking through the and ridgeline of the roof. For the stability of the building, 2x6s need to be added to the outside of the floor joist triangles. Finally, flashing should be added over the outside of the rim boards to the bottom of the walls. |
| + | <gallery class="center" mode=packed heights=150px> | ||
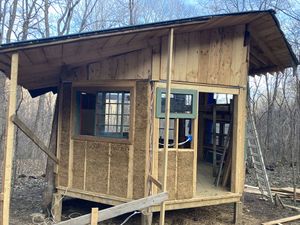
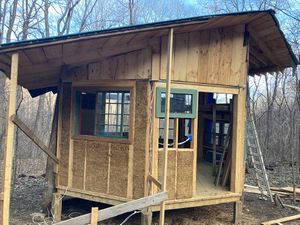
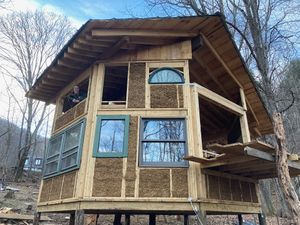
| + | File:FrontOctogon.jpg|Front of the Octagon | ||
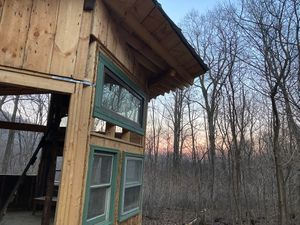
| + | File:BackOctogon.jpg|Back of the Octagon | ||
| + | File:RightOctogon.jpg|Side of the Octagon | ||
| + | </gallery> | ||
Latest revision as of 17:11, 7 March 2021
Contents
Foundation
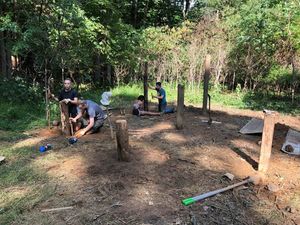
The octagon cabin rests on nine main posts and two extra for the bump out. The posts are mainly locust trees that were felled on the land. The center post is a power line post taken down from when Lisa and Elizabeth went off-grid. The post holes were dug to go below the frost line so that they wouldn't rise out of the ground when it freezes during the winter. The posts were then debarked and put in the ground. To make them stable we tamped dirt and rocks into the hole slowly with sticks.
Flooring
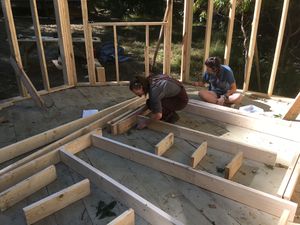
The octagon floor is made of eight triangles. Because our posts didn't quite end up in the right place, each triangle is slightly different, but all follow the same general shape. To make them, we cut 2x6 boards using a chop saw powered by our generator, but some cuts had too sharp of an angle, so we cut them by hand. Above the triangles is a sub-floor made of locally cut and processed wood. We nailed parallel subflooring boards to the floor joists, making sure to overlap the ends of boards over joists, and then trimmed each board by cutting around the perimeter of the octagon with a circular saw. We left 1 1/2 inches of overhang to cover an additional band of 2x6s that will eventually reinforce the screws that hold together the triangles together. We discovered live worms in the subflooring boards so we covered them in deck stain to kill the worms and protect the wood.
Wall Frames
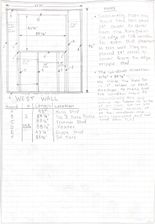
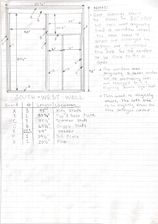
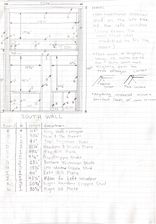
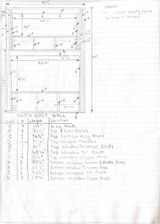
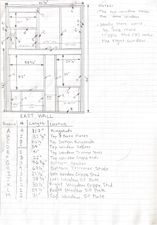
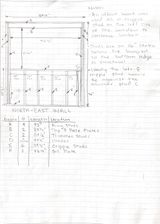
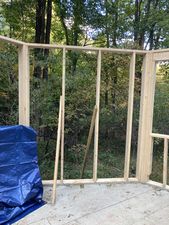
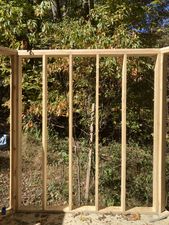
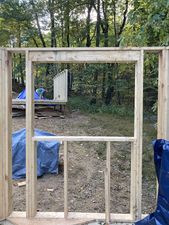
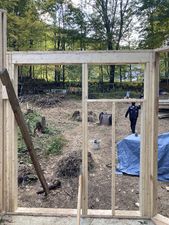
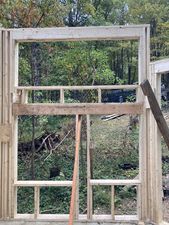
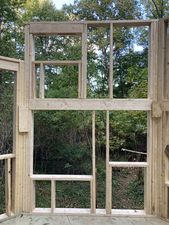
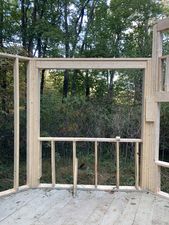
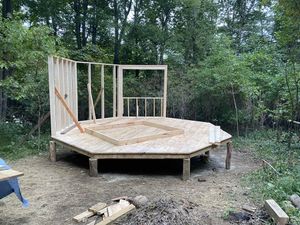
When we designed the wall frames, we started by inventorying the windows we had and figuring out where they would work best to maximize southern sunlight. Beyond that, we followed rules about headers and stud placement. To make the wall frames, we cut 2x6 boards on the chop saw and assembled them with screws.
Progress Photos:
Insulation
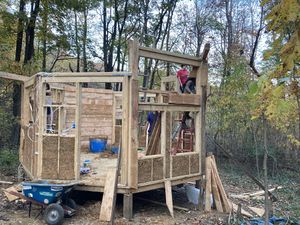
The octagon insulation is made up of sections of light straw clay and bottle walls. Both required a multi-step process. For the light straw clay, we sifted clay harvested on the land, mixed it with water to make a clay slip, then tossed it with local straw and packed it into the walls. We tried stomping at first, then pushed it in with our hands, then started just pushing the edges of each section down with sticks to keep the center less packed. For every two feet we went up we put in a piece of wire to give it support. For the bottle walls, we cut four inches off the bottom of wine bottles and then taped two pieces together to make an 8-inch long section to put into the 5.5-inch thick walls. The taped-together bottles were packed into the wall with cobb between them.
Roofing
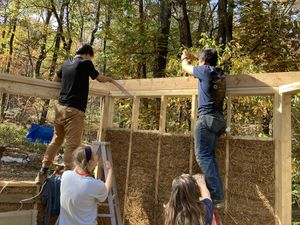
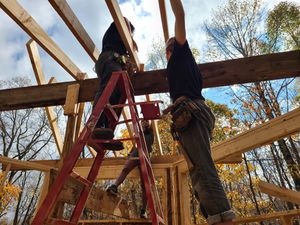
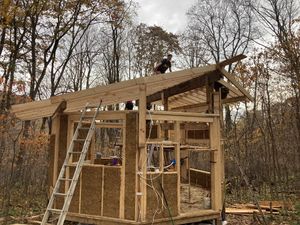
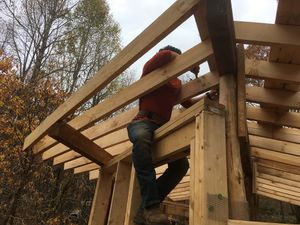
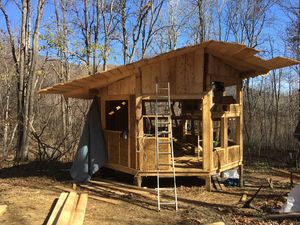
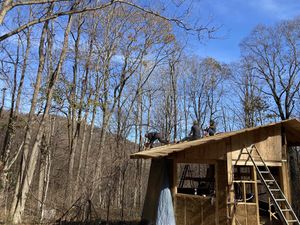
The roof system is built out of 2x6 rough cut rafters, suspended between a ridge beam and two beams mounted on the top of the north and south walls. The ridge beam is made from two 12' 4x12s combined with a half lap joint. The beam is supported under the joint and on the east and west sides by 12' poplar posts which were cut down to clear the site. 45-degree poplar sections connect the beam to the posts and provide extra support. The north and south beams are 14' 4x6s bolted to the north and south walls on top of the double top plate. The rafters angled towards each other to create a skinnier roof on the north and south sides than in the center.
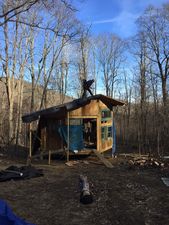
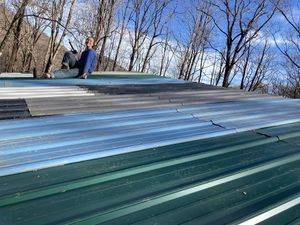
The ceiling was built out of the same rough-cut boards as the subflooring and nailed to the rafters. We tacked roofing paper to the ceiling then covered the roof in overlapping corrugated metal roofing. We cut the edges of the roofing with an angle grinder.
Installing Windows
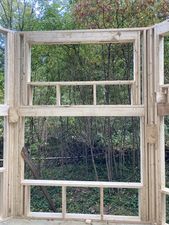
We nailed and screwed the pre-cased windows into the holes for them in the wall frames. For some windows, we built frames and attached them to the outside of the windows so the window could be attached to the wall.
Loft Construction
The loft is supported by the east wall, the southeast wall, and the center poplar post. It is built with 2x6 girders and 2x3 joists.
Future Steps
As of 12/16/2021, the octagon was Tyveked to be waterproof for the winter. In the spring or future, the octagon will need plaster on the walls to protect the light straw clay insulation. In addition to the plaster, a few other projects have to be completed to fill gaps in the walls. One window still needs to be framed and installed in the top of the southeast wall, and a front door needs to be installed. The sections left open for bottle walls need to be completed or filled with light straw clay. A bump-out needs to be constructed or something needs to be installed to cover the hole to it to leave it as a deck, and the section above the bump-out, between the northeast Wall and the roof, needs to be covered with boards. To complete the roof, a hole needs to be cut for a chimney pipe from the woodstove. It would also be good to add some kind of waterproofing or filler between the ridge cap and the roofing to prevent water from being blown upward and leaking through the and ridgeline of the roof. For the stability of the building, 2x6s need to be added to the outside of the floor joist triangles. Finally, flashing should be added over the outside of the rim boards to the bottom of the walls.
